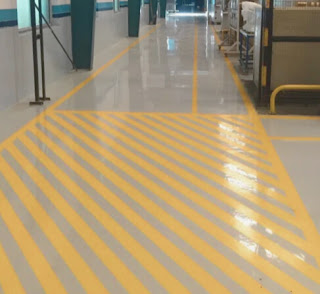
Step-by-Step Guide to PU Flooring Installation: What to Expect
Step-by-Step Guide to PU Flooring Installation: What to Expect
Polyurethane (PU) flooring has emerged as one of the most reliable and versatile flooring solutions for industrial, commercial, and even select residential settings. Known for its durability, chemical resistance, and ease of maintenance, PU flooring is particularly favored in environments such as food processing units, pharmaceutical plants, warehouses, laboratories, and commercial kitchens. While its benefits are widely recognized, the success of PU flooring depends heavily on the quality of the installation. If you’re planning to invest in this robust flooring solution, understanding the process involved can help you make informed decisions and set realistic expectations.
Below is a detailed, step-by-step guide to the PU flooring installation process, covering everything from surface preparation to final curing.
1. Initial Site Inspection and Surface Evaluation
The first step in any PU flooring project begins with a thorough site inspection. A trained professional will assess the condition of the substrate, typically a concrete surface. Key factors such as moisture levels, cracks, unevenness, oil stains, or previous coatings are evaluated. This initial step is crucial because polyurethane coatings require a clean, dry, and structurally sound base to adhere properly. Moisture testing, surface hardness evaluation, and adhesion checks are common practices during this phase.
2. Surface Preparation
Proper surface preparation is critical for ensuring long-term performance. Without this step, even the best PU flooring systems can fail prematurely. Preparation may involve several mechanical methods such as shot blasting, scarifying, or diamond grinding. These techniques remove contaminants, old coatings, dust, and debris, while also opening the pores of the concrete surface to promote strong adhesion.
Cracks or holes are filled with epoxy or polyurethane-based fillers. Any oil or grease present on the surface is treated with degreasers and thoroughly cleaned. After this, the surface is vacuumed to remove fine particles and ensure a dust-free environment.
3. Application of Primer Coat
Once the surface is adequately prepared, a primer coat is applied. The primer serves as a bonding layer between the concrete substrate and the PU flooring system. It penetrates the concrete surface and helps seal minor pores while improving the grip of the next layers. Depending on the type of PU system being installed, the primer may be solvent-based, water-based, or solvent-free. Curing times vary, but most primers are allowed to dry for several hours before the next layer is added.
4. Laying the Base Coat
After the primer has cured, the next step involves the application of the base coat. This is usually a self-leveling polyurethane compound designed to create a strong, resilient underlayer. It evens out minor surface imperfections and provides the foundation for the topcoat.
For thicker installations, a screed or mortar version of PU may be used to achieve desired thickness levels. The material is spread evenly using a trowel or roller and allowed to settle naturally to create a smooth finish. In some systems, additional reinforcing materials like quartz sand may be broadcast over the base layer to enhance slip resistance or surface texture.
5. Application of the Topcoat
Once the base layer has cured sufficiently, a topcoat is applied to provide the final finish and protection. This layer defines the look, color, and surface properties of the floor. It enhances resistance to abrasion, UV exposure, chemicals, and temperature variations. The topcoat also determines whether the floor has a glossy, matte, or anti-slip finish.
In high-traffic industrial environments, polyurethane topcoats are selected for their elasticity and thermal shock resistance. For commercial settings like showrooms or kitchens, decorative flakes or pigments can be added to customize the appearance.
6. Curing and Drying Time
After the final coat is applied, the flooring needs time to cure properly. Curing time can vary based on the type of polyurethane system used, room temperature, humidity, and thickness. In general, light foot traffic is allowed after 24 hours, while full mechanical or chemical exposure may require 3 to 7 days.
It’s essential that the floor be protected from dust, water, or any contaminants during the curing process. Proper curing ensures that the coating reaches its full strength and performance levels.
7. Final Inspection and Quality Check
Once the flooring is fully cured, a final inspection is conducted to ensure the quality of the installation. This includes checking for uniformity, surface finish, color consistency, and proper bonding. Any areas that need touch-ups or adjustments are addressed at this stage. The floor is also tested for slip resistance, flatness, and other customer-specific criteria.
Upon successful completion, the contractor may provide maintenance guidelines and warranty details to help maintain the floor's appearance and performance over time.
What Makes PU Flooring Installation Unique?
PU flooring is known for its flexibility, chemical resistance, and thermal shock tolerance. Unlike epoxy, polyurethane can withstand high-temperature washdowns and rapid temperature changes, making it ideal for cold storage, dairies, and food-grade facilities. Its elasticity also offers better resistance to impact and vibrations, which is a valuable asset in industrial plants or areas with heavy machinery.
However, these benefits are only realized when the installation process is executed with precision and expertise. Each layer plays a crucial role in the system’s overall integrity. That's why it’s strongly recommended to hire experienced PU flooring professionals who follow industry standards and safety protocols.
Conclusion
The installation of PU flooring is a meticulous process that requires technical skill, the right materials, and proper planning. From the initial assessment and surface preparation to the final topcoat and curing, each step influences the longevity and performance of the finished floor. Understanding what to expect during this process not only helps you make informed decisions but also ensures you get the most value from your investment.
Whether you're upgrading an industrial facility, outfitting a cleanroom, or preparing a commercial kitchen, professional PU flooring installation offers a high-performance, long-lasting solution tailored to your specific needs.
ALSO READ: What Is ESD Flooring? Everything You Need to Know


Comments
Post a Comment